
Visible quality issues
Despite the (sufficiently) high quality specifications of the video file supplied, the entire video, or parts and elements thereof, does not look good enough for broadcasting. This can be caused by 1) footage or settings of low quality or bitrate, 2) low resolution or 3) incorrect color settings:
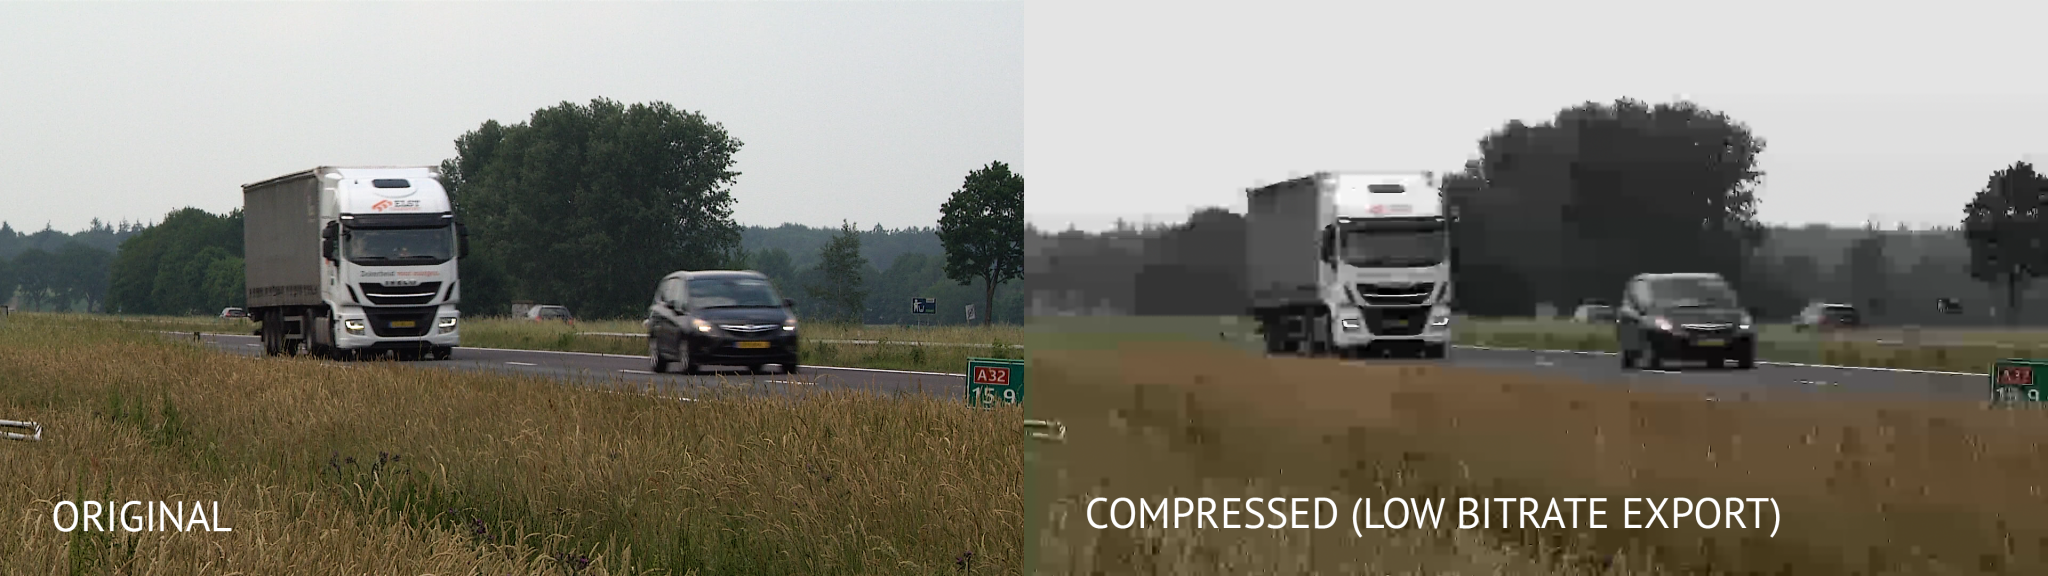
- Low quality: The quality settings of the output may be set good and high, but a low quality setting has been used somewhere in the production process. With this quality we mean settings regarding bitrate or file size. Bitrate is the amount of computer data (bits) per second to store a video. For more information, see Low video or audio bitrate. Small files and low bit rates always result in lesser quality, because the software has to discard a lot of details. Otherwise, the file cannot be saved that small. Check whether high quality settings are used in the entire video production (recording and source files > editing and effects > export). Also avoid using low quality or bitrate footage. Always check these files carefully to see if the quality is sufficient (little to no compression distortions). Below an example of this digital distortions due to heavy compression:
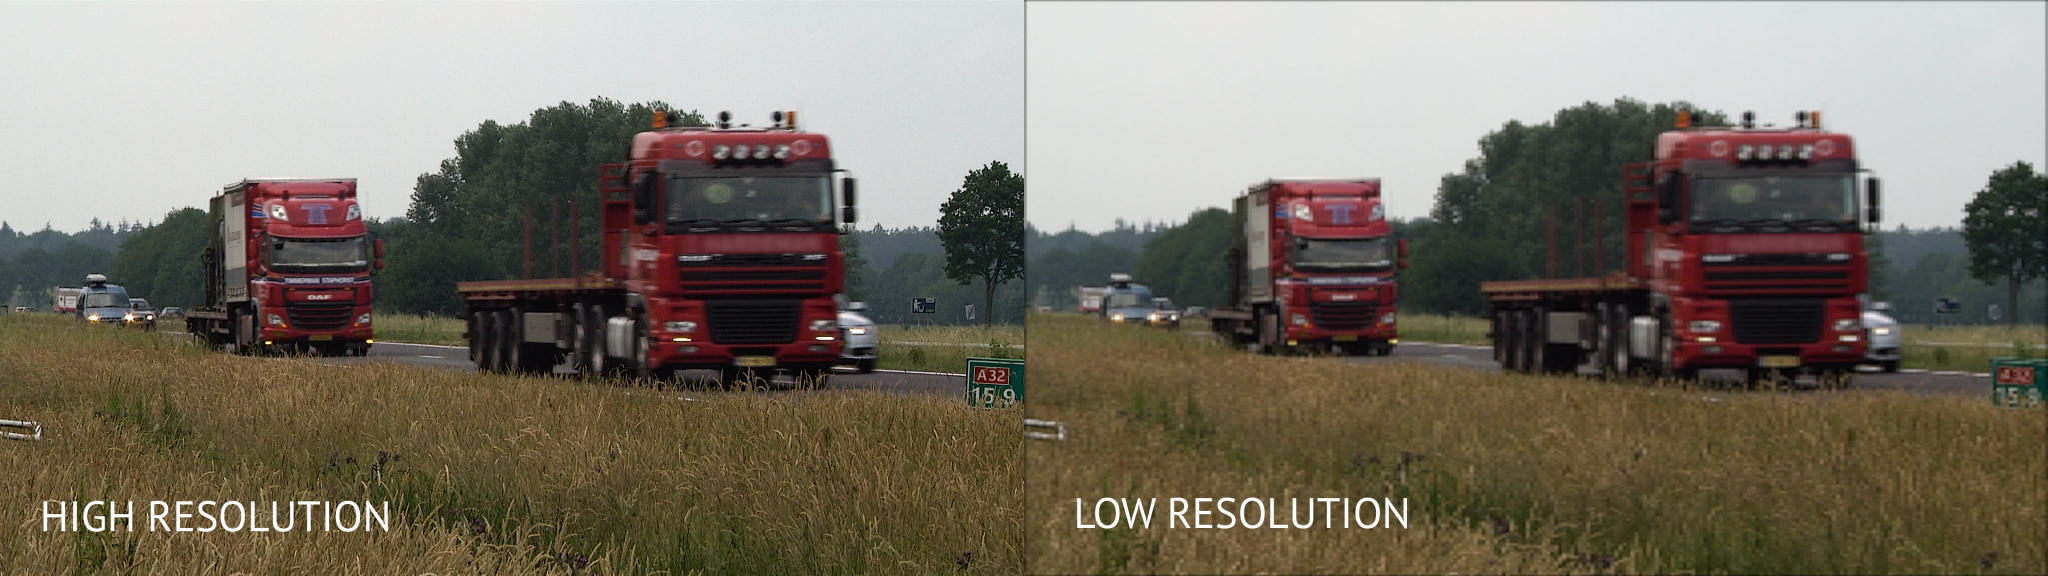
- Low resolution: In addition to compression, the resolution (number of pixels in width x height) also influences visible quality. Low resolution files need to be enlarged digitally, to get it fit in, for example, the Full-HD 1920x1080 resolution. This gives a blurry and pixelated result. Avoid using footage that has a (much) lower resolution when you edit. This resolution must be at least 80% of the video resolution of your workspace, and the final export (save as video file) to be able to display full screen. For the Full-HD resolution, this would mean that the source file must be at least 1600 pixels wide and 700 pixels high.
But too much digital zooming can also cause this pixelated problem. The footage itself may look very sharp, but if you digitally enlarge it too far, it will also give a blurry and pixelated result. To maintain good quality with digital zoom, you must ensure that you use very high resolution (and quality or bitrate) source files. For example, to enlarge twice in Full-HD (200%), the source material should actually be the double resolution, so Ultra-HD (3840x2160 px). Also check that your editing software has not already downscaled the high resolution file on import or on the fly to the resolution of the sequence or timeline. Because again, you can't zoom in much to that footage, because much of the resolution of the source files has already been discarded. Consult the manual or help function of your editing software for more information about how your software handles different resolutions.
- Wrong color settings: The choice of how the clip should look in terms of colors is often an artistic and conscious choice. Whether you like it or not is a personal opinion, and there is little to say about it at a qualitative level. Brightness settings are a particular point of attention for broadcasting. If the video is too bright (we call this "overexposed") or too dark (this is called "underexposed"), you lose details in the image. Video has a certain maximum dynamic range, that is the difference between all black and all white. With overexposure, the video becomes so bright that elements in the image close to white also becomes completely white. Brighter than clear white is not possible. The same applies to underexposure; darker than clear black is not possible. Therefore always check that the video recordings are not too bright or too dark exposed. Please note: over and under exposure in the recordings cannot be recovered! Then further in de video production make sure in your editing software that you do not overexposure or underexposure the video with the color correction effects. To let as many details as possible in the bright and dark tones remain intact, without the white becoming too gray or the black to pale. Also make sure that there are no incorrect translation errors in the colors when exporting, which also can cause over or underexposure in the final file. Below an Example of over and under exposure in which you can clearly see how actual details in the image get lost in bright or dark areas.
